How To Make

You are currently browsing the archive for the How To Make category.

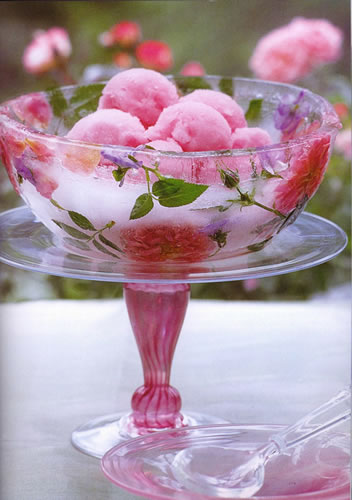
floral-ice-bowl

I wrote an article earlier in the week about edible flowers and which types are safe to eat.  This article has lots of ideas to make your flowers into tasty creations and how to preserve them for the winter.

Pick your flowers early in the day when they are packed with flavour.  Look for flowers that have just opened and leave any look past their best or dirty.  Only ever eat flowers that you are sure are edible as some are poisonous.  Remove the pollen and stamens from flowers as well as the green parts under the flower.  The white part at the bottom of rose petals is bitter so it should also be cut off.  Anyone with allergies should avoid eating flowers.

One of the easiest things to do with edible flowers is make tea.  Peppermint, lavender or lemon verbena, make a lovely refreshing tea.  Leave one or two sprigs to infuse in a cup of boiling water for about 4 minutes and then remove.  Chamomile tea is known to be calming and may help you sleep better.  Don’t add milk to these drinks, but a touch of honey can be added to sweeten them.
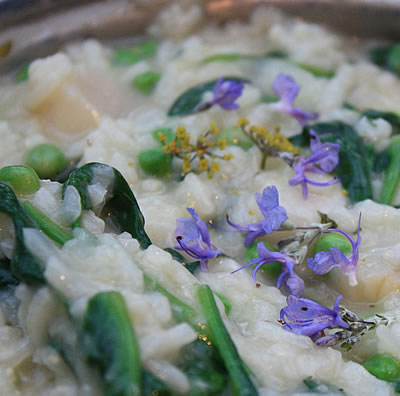
rosemary-flower-risotto

Winter can be an uninspiring time for flowers, but if you plan ahead you can preserve them to use when you wish.  A great way to preserve the flavour and scent of flowers is to put them in oil.  Marjoram, thyme and lavender are great in cooking. Floral oils will keep for up to 6 months.  Ice cubes are another way to preserve flowers, and they look so pretty.  Freeze small flowers or individual petals of larger flowers in ice cube trays.  Roses and scented geraniums work well.  They can be added to drinks for flavour and scent.

Scented sugar is lovely in cakes and meringues.  Mix a couple of cups of rose petals in a food processor with 225g of caster sugar.  Leave the sugar in an airtight container for a week and then sieve the rose petals out.  The sugar can be used to make a subtly flavoured butter cream or added to cakes and meringues.  You could also try making lavender or violet sugar.
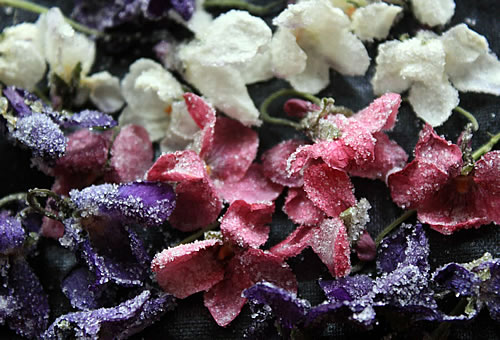
crystalised-flowers

Crystallised flowers are lovely decorations for cakes and deserts.  They will last a couple of days if stored in an airtight container.  Use a small brush to paint the flowers with egg white on both sides, and then sprinkle them with caster sugar.  Use small flowers like mini roses or violets, or separate petals from larger flowers.  Spread them out to dry on greaseproof paper, if you have used whole flower heads hang them upside down to dry out. If you’d prefer not use raw egg whites, powdered or pasteurised egg white will work too.

All images are from Kathy Brown her lovely book is available on her website.  It’s full of beautiful photos and scrumptious recipes to make with edible flowers.

Tags: , , , ,

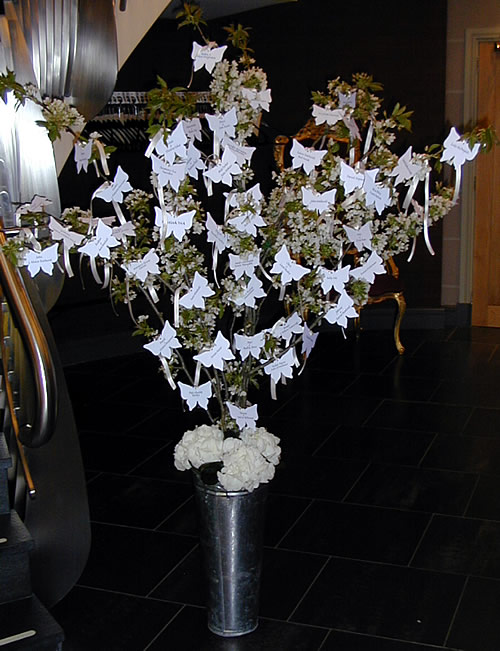
cherry-blossom-wishing-tree

Wishing trees are a lovely alternative to guest books, friends and family write messages of love, luck or sometimes advice for a happy marriage.  The tags can be put into an album after the wedding as a keepsake or next to photos of the guests.  This easy guide gives step by step instructions to make your own wishing tree and a few ideas to decorate it.

Materials needed:
Branches, container for tree, floral foam for dry flowers, tags, narrow ribbon, tray or basket for tags, frame to hold instructions, glue, crystals, decorations, spray paint, pens, reel of florist wire.

Tips
Look for full branches that have lots of small twigs to hang your decorations on like manzanita branches.  They also need to be quite sturdy to hold all your decorations and tags.

If you want to make a large wishing tree for a real focal point, you may need to bind a few branches together.  Use the reel of florist wire to tightly secure the branches.

Select a container roughly 1/3 of the height of your branch so it won’t be top heavy, but don’t forget your branch will be pushed to the bottom of the container.  You can add extra weight to the base by adding some decorative gravel or stones.

If you want to decorate your own tags, buy plain ones with ribbon to match your wedding colours.  Add touches like diamantes, or stamp pictures on them.  You could order a hand carved stamp personalised with your names and wedding date, you can find these on etsy.

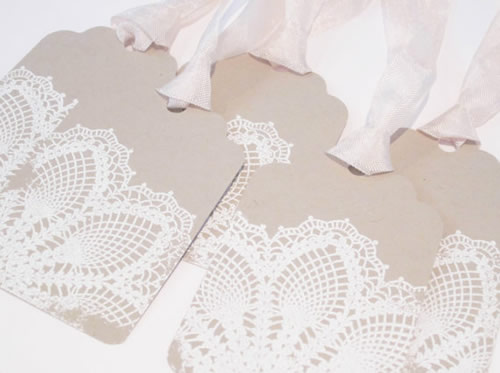
lace-embossed-wishing-tree-tags

image: Anista Designs, Etsy

1/ Spray paint your branches gold or silver outside and leave them to dry.  Make sure you spray them over a piece of card or a box as spray paint will stain.  Leave the branches overnight to dry. If you prefer a natural looking tree leave the branch bare.

2/ Cut the dry floral foam to size and push it into the container, it’s better if the oasis is slightly too big and it is wedged in rather than too small as the tree will wobble about.  Hide the oasis with decorative gravel, polished stones or moss.

3/ Drape your crystal garlands on the tree ensure they are spread through the branches all the way round the tree.

4/ Attach any decorations like butterflies or silk flowers by wiring or gluing them onto the branches.

5/ If you have made your own tags and attached accessories to them leave any glue to dry overnight before putting them away.

6/ Print out instructions or a poem for your guests telling them what to do and put it in a pretty frame next to your tree.  Make sure you ask them to sign the card too.

7/ Put a couple of nice pens next to your wish tags.

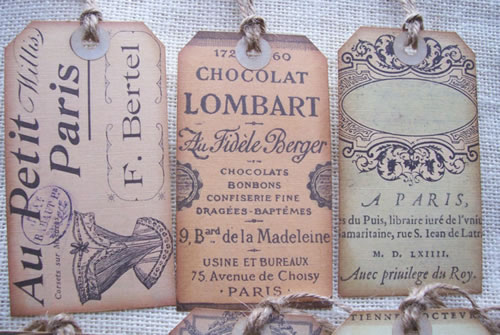
vintage-wishing-tree-tags

image: Manifest Your Heart's Desire, ebay

A few more ideas ideas:

Fairy lights look very pretty at night, wind some battery powered lights around the branches of your tree for a magical touch.

For a romantic wishing tags print the dictionary definition of love on the cards, and add the day you both met to it.

For vintage theme tags use handcrafted Kath Kidston print tags or tags with lace style cut out edges.  Lots of seller on eBay make unusual or vintage tags.

There is more info about wishing trees in this post

Tags: , , ,

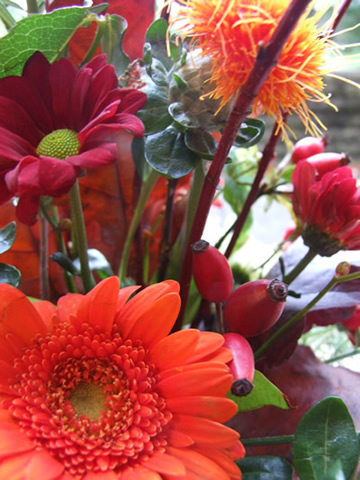
autumn flowers

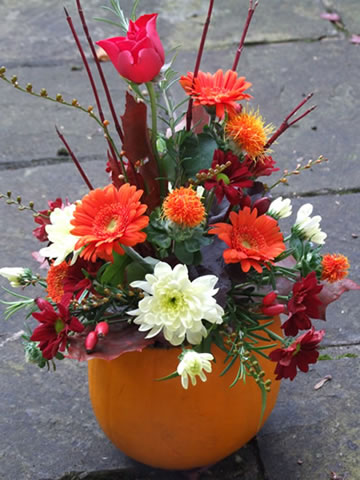
Everyone knows pumpkins make fun lanterns for Halloween, but did you know pumpkins also make great containers for autumn flowers.  Pumpkins look gorgeous with rich shades of autumn flowers.  I’ll tell you how to make your own autumnal pumpkin arrangement in a few simple steps. Before you get started you need to gather a few bits and bobs; a few fresh flowers in autumnal tones, some foliage, a block of floral foam and a few pieces of cellophane.  You can get most of your equipment from a florist shop; if you’ve got a garden have a look for any autumnal foliage you can forage to go in your arrangement.

Before you buy your pumpkin think about how big you want your arrangement to be, as your finished arrangement will be three times the height of the pumpkin.  So if you have a tiny space to display your arrangement in don’t buy a monster pumpkin.

To start slice the top off the pumpkin and scoop the flesh out.  Soak your floral foam in a bucket of water.  While your foam is soaking fill the bottom half of your pumpkin with scrunched up cellophane.  Cut a large piece of cellophane and place your oasis on it’s end in the centre of the cellophane.  Place the oasis and cellophane in the pumpkin, cut the oasis off about two inches above the top of the pumpkin and chop the leftover piece into two wedges, these can be pushed either side of the oasis in your pumpkin to make it fit snugly.  Trim off any excess cellophane.

pumpkin arrangement

You can now start putting your foliage and flowers into the oasis.  I used a mixed bunch of autumn flowers and a few berries and twigs from my garden.  Add the foliage first to make the outline for your desire shape and then follow that shape with your flowers.  If you’ve got any lovely autumn coloured leaves in your garden add them to your design.  When you’ve added all your flowers, check for any gaps where you can see the oasis and add some more foliage at those places.

Tags: , , ,

cookiejar3

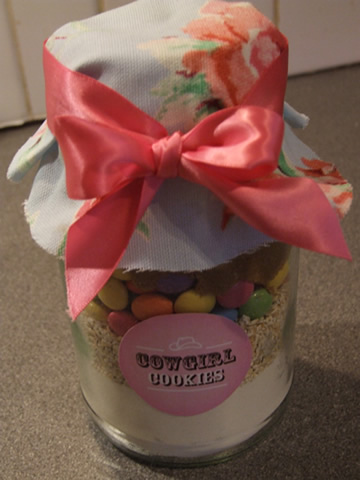
These are lovely gifts for anyone with a sweet tooth like me, or maybe someone who doesn’t have time to faff about baking from scratch.  Nothing beats homemade cakes and cookies.  The original recipe is from Bakerella, but I’ve made a few tweaks, as I found the original recipe a little too sweet. They are delicious chocolaty oaty cookies, I left the pecans out as I’m not a fan of nutty things (I baked a batch of cookies first before making a jar up just to sample a couple or five)

You’ll need:

1 1/3 cup of self-raising flour or 165 grams

1 teaspoon baking powder

¼ teaspoon salt

1 cup oats or 95 grams

¾ cup of smarties (which worked out at 4 tubes)

½ cup of brown sugar or 75g

½ cup of golden sugar or 75g

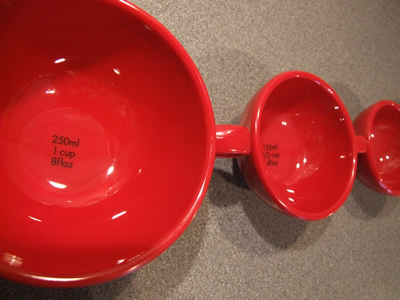
measuring cups

You’ll also need a large glass jar, a small piece of fabric and some ribbon to decorate your jar.  I used a Large Douwe Egberts jar, but you can buy glass jars from TK Max or supermarkets.  I set up a piping bag rolled down to funnel the ingredients through, if you don’t have a piping bag you could make a funnel with some baking parchment.

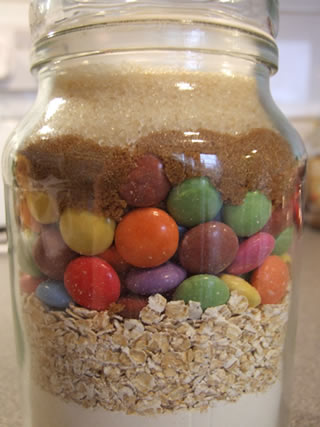
I played around with the order of the layers and finally decided on flour first, then oats, smarties, brown sugar and caster sugar.  Make sure you pack each layer down really well, or it won’t all fit in the jar.  My ingredients just about fit in a large Douwe Egberts jar, you can buy plain glass jars from supermarkets too.  The ingredients should be flush to the top of the jar.

You’ll need to make labels and instructions for making the cookies.  You can design your own labels or use the ones on Bakerella’s site like I did, they are very cute.  I stuck the Cowboy cookies labels on the front and the instructions on the back of the jar.  Finish off your jars with a square of pretty fabric tied over the top of the jar with co-ordinating ribbon.

If you want to make these cookies yourself it is very easy using the jar mix.  First preheat your oven to 180 degrees or gas mark 4.  Mix the contents of the jar together in a large bowl.  Then add the beaten egg and softened butter and stir to form the cookie dough.  You might need to press the mixture together with your hands to get all the last bits to stick together, your hands will get sticky soon anyway.  Line a baking tray with baking parchment, then roll 1 ½ inch balls of cookie dough and place about 2 inches apart on the baking tray.  As the balls bake they will flatten into lovely cookies.

Tags: , ,

red wreath

When the festive season is upon us there’s no better way to get in the Christmas spirit than to make a lovely wreath for your front door.  You will need a wreath base pre-made with Christmas foliage such as holly and spruce.  If you are feeling adventurous you could make the base yourself by mossing a wire frame and wiring each piece of foliage to it, but that can be a bit complicated (and messy) for beginners.  So I’ll assume you have your foliage wreath, which can be bought from florist shops or garden centres etc.

On top of your decorations you will need some strong florist wires and one and a half metres of a nice fabric ribbon. Some florists sell loose cinnamon sticks and dried fruits like a pic and mix of Christmas goodies.  Small packs of miniature baubles are perfect for grouping on Christmas wreaths.

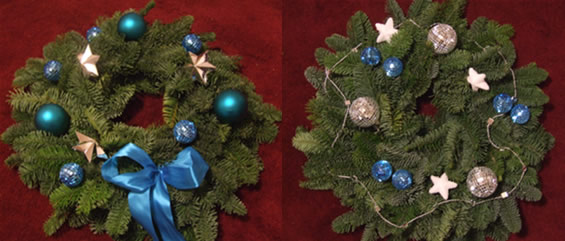
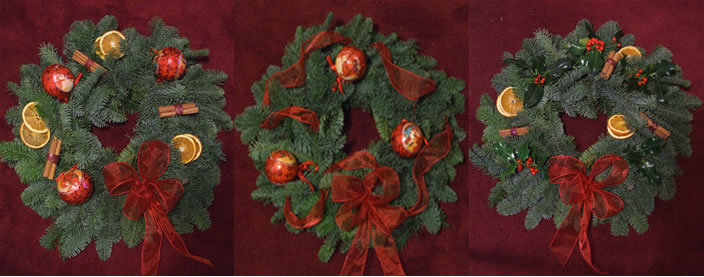
As far as decorations go, it’s all down to personal taste.  You might prefer the traditional look with orange slices and cinnamon sticks, or you might fancy something more modern and sparkly.  You can use anything you like on your wreath from baubles to ribbons, fruits, silk flowers, wrapped sweets or even mini battery powered lights.  I’ve included a few pictures to give you some inspiration.

Silver and blue Christmas wreaths

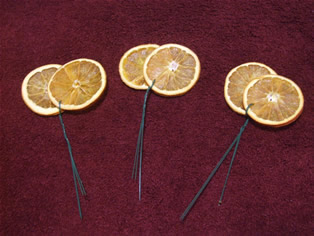
Once you have decided what you are going to put on your wreath I find it helps to lay the items roughly where you intend to put them on the wreath.  They will look most pleasing in odd numbers.  Groups of three work well on Christmas wreaths.  You will need to wire each item to attach it.  I’ve used dried orange slices as an example below.  Take the orange slice, I’ve used two together and push about half of the wire through the orange slice.  Bend both wires down and wrap one piece tightly around the other twice and then wrap down the length of the wire.

dried orange slices wired wreath decorations

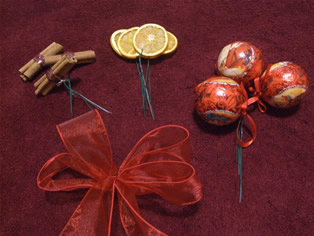
Follow this step with all of your decorations.  If you have baubles that can’t be wired through, wire them on the loops they have.  For cinnamon sticks gather three into a bundle and wrap wire tightly around them.  Then cover your wire with thin ribbon or raffia.

To make your bow take your ribbon and lie it in the shape shown in the first picture below. Then gather the ribbon together in the middle and twist one loose end under the bow so both ends hang down, these are the tails.  You should now have four loops and two tails. Then wrap a wire around the centre of the bow where you are holding it and secure it tightly it as you did with the other decorations.  Once the bow is wired you can fluff the loops out to make it fuller.  It helps to add your bow to the wreath first as it is quite large.

Christmas wreath bow

Once you have your bow and enough decorations wired you can start to add them onto the wreath.  Take the wire and push it through the foliage into the moss base.  If you find the wire poking out through back of the wreath, bend it back on it self and push it into the moss so you are left with a small loop of wire showing, this will help anchor the decorations to the wreath base.  You should add each group of decorations in turn so you can evenly space them, i.e. all the orange slices and then all the cinnamon. It’s usually easier to start with your biggest decorations first.

Red Christmas wreaths

Holly and spruce will last well on a wreath as the foliage is quite hardy, but fresh flowers will wilt without a source of water.  Whole fresh fruits such and Satsumas and small apples will last a couple of weeks but dried slices will last much longer.

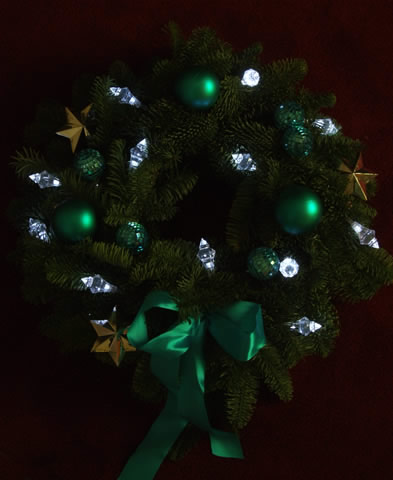
Miniature lights can add extra wow factor to your wreath. Small battery powered lights are perfect for wreaths.  If you decide to use lights, it is easier to wind them through your wreath before putting any other decorations on, just make sure you don’t push any wires through them. When you are happy with your finished wreath make a loop of wire or ribbon through your wreath, secure it, hang and admire!

Christmas wreath with lights

Tags: , , , , , , , , , ,

« Older entries